Inverted Row - Instructions, Variations & Alternatives
Muscles involved
- Rhomboids
- Trapezes
- Deltoids
- Lats
- Biceps
- Forearms
- Hamstrings
- Glutes
- Abdominals
Also known as
- Bodyweight Row
- Body Row
- Supine Row
- Supine Pull Up (not to be confused with supinated grip pull-up or chin up)
- Australian Pull Up
- Australian Row
- Aussie Pull Up
- Fat Man Pull Up
- Reverse Row (less common)
The Inverted Row is a bodyweight exercise that can be performed using a horizontal bar or suspension trainer (like TRX straps). It’s an excellent choice for people looking to develop their pulling strength without the need for heavy weights or gym equipment.
When performing the Inverted Row, you’ll primarily target the back and shoulder muscles. However, it also helps to improve your overall arms and grip strength, as the biceps and forearms also play an important role in pulling the body towards the bar. The glutes and hamstrings are also isometrically engage throughout the entire movement.
How to perform

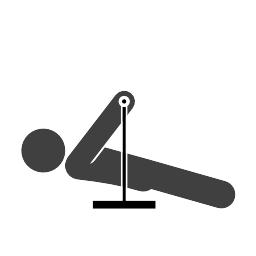
Inverted Row - Relaxation (start/end position)

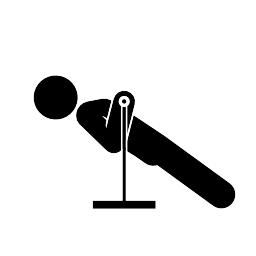
Inverted Row - Contraction (muscle under tension)
-
Set up & starting position
Set up a horizontal bar or suspension trainer at about waist height. If you’re using a bar, you can use a Smith machine, a squat rack, or even a sturdy table or similar object.
Get under fixed horizontal bar, grip it and lower yourself until your arms are fully extended while keeping your body suspended off the floor. Make sure your body is in a straight line, engage your glutes and core muscles. -
Concentric phase
Pull yourself up, getting the bar as close as possible to your chest - doesn’t need to touch the bar. -
Isometric hold
Pause for a moment and make sure the shoulder blades are retracted. In this top position, the bar should be at mid-chest. -
Eccentric phase
Slowly lower your body back down to the starting position with controlled motion and repeat.
Common Mistakes & Tips
You can use a wide or narrow overhand or underhand grip. However, it’s best to start with a grip that is slightly wider than shoulder-width.
Posture is key, so it’s important to avoid these common mistakes:
- Keep your body straight, forming a line from your torso to your feet and engaging your core and glutes.
- Avoid going too narrow or too wide, this can lead to increased wrist and elbow stress as your forearms come out of proper alignment.
- The movement should be slow and controlled.
Exercise Variations
Inverted Row or Bodyweight Row has many variations, resulting from changes in the hand grip and spacing, as well as the leg and body position:
- Hand grip options - supinated, pronated, neutral or mixed

Pronated or Overhand Grip - Thumbs in

Hammer or Parallel Grip - Palms facing, forearms in neutral position

Supinated or Underhand Grip - Thumbs out
- Hand-spacing width - wide grip, close (narrow) grip or standard grip (i.e. shoulder width)

Standard Grip

Narrow or Close Grip

Wide Grip
- Legs placement - bent or extended
- Body inclination - from slightly leaning back with the high bar to a position close to the horizontal, or even inverted with the feet raised.
How to progress
You can adjust the difficulty of the Inverted Row by changing the angle of your body. The more horizontal your body is to the ground, the more challenging the exercise becomes.
Beginner options
- High Inverted Row - If you’re just starting, you can make it easier by raising the bar or handles higher or using a higher incline (the more upright you are, the easier it will be). As you get stronger, you’ll be able to drop the bar until you’re parallel when pulling yourself up.
- Legs-Bent Inverted Row - Bend your knee at 90 degree and place your feet flat on the floor to limit the percentage of your own bodyweight that you’re lifting. This is also, generally, a more stable position.
Advanced options
- Feet-Elevated Inverted Row - Once you’re comfortable with the standard movement, progress by elevating your legs on a box or flat bench to add extra range of motion.
- Weighted Inverted Row - If you really want to up the difficulty of your inverted rows, try doing it with a little bit of weight attached to you.
Consider using suspension straps or rings, as this requires extra effort for stability, or elevate your feet on a med-ball to increase the difficulty.